Preface
Xamarin is a powerful development environment for creating apps for multiple platforms, using the same C# code base. The new Xamarin Forms technology will even allow you to use most of your UI code between different mobile platforms. Just have to say I LOVE this technology because I can make Android & iOS apps from the same code, rather than using 2 or 3 other languages.
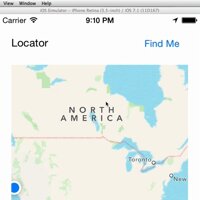
Onto our app.. This example is meant to be simple and quick, and give you a taste of Xamarin development. We are going to make an app that shows a map, and then zooms into your current location when you click a button.
Prerequisites
You can deploy this app to the iOS Simulator or a real iOS device if you have that set up on your Mac already. Oh yeah, you’ll need a Mac, otherwise you’d have to do this somewhat differently on a PC using Visual Studio with Xamarin plugins. The app may be too big to deploy using the Xamarin Starter edition on its own. If you try to publish for iOS and get messages about the app size, take the option to start a free trial.
Create an iPhone App
-
- First thing we want to do is create an iPhone app project in Xamarin. Choose File > New Solution
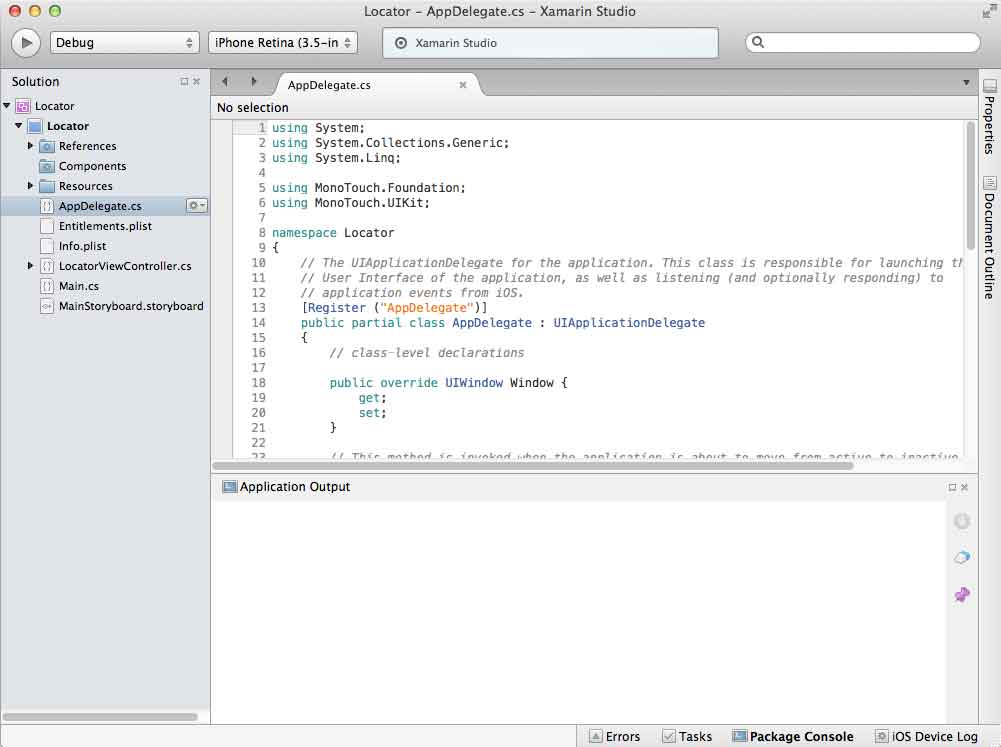
- Give this solution the Name Locator. Xamarin will generate a project that should look like this:
Visually Build the Screen
-
- Next, we visually build our app screen with some standard iOS components. To do that, go to the Solution pane on the left and double click the file MainStoryboard.storyboard. You should get a blank storyboard like this:

-
- Note the Toolbox and Properties panes. We are going to drag components from the Toolbox onto the storyboard, size and position them, and then customize them in the Properties. Drag these components from the Toolbox onto the storyboard so it looks like the image below:a) Label
b) Button
c) Map Kit View

Customize Components and Add Hooks for the Code
-
- To resize components, just grab an edge and drag. Let’s start with the Label first. Click on it and then go to the Properties pane in the Widgets. Change the Text property from “Label” to “Locator”
- Next, lets give the Map Kit View a hook so we can access it in code. Click on it and set the Name property to “myMap”.
- Finally, click on the Button and change the Title text to “Find Me”
- Set the Name property to “findMeButton”
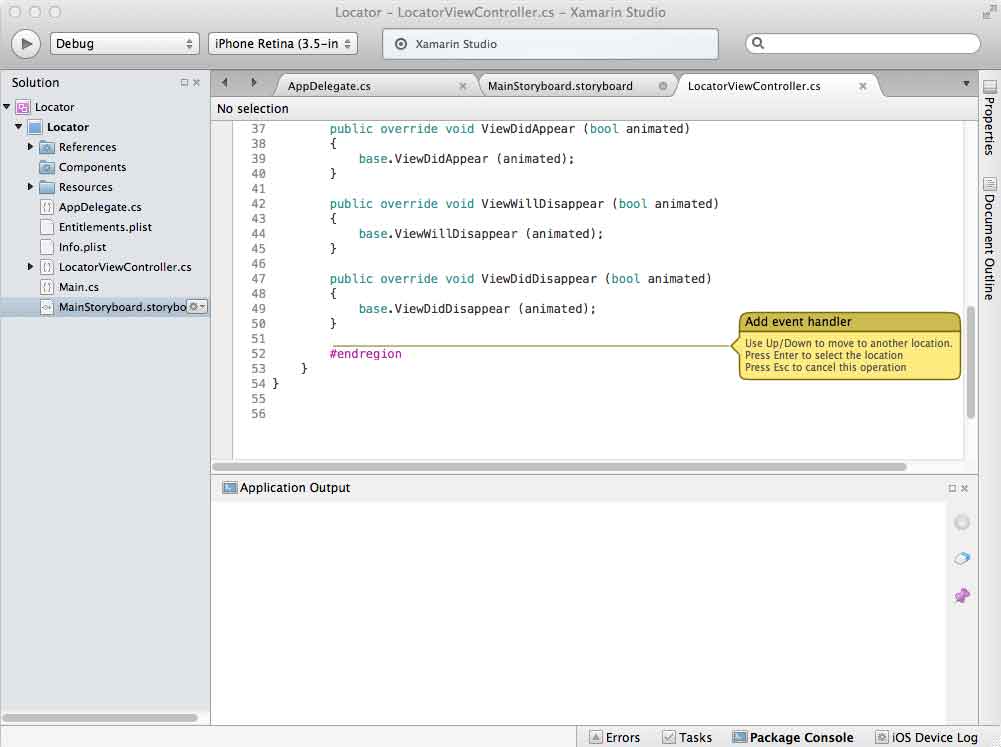
- To detect the user pressing the button, we could set up the Events tab and write functions or we could let Xamarin generate this code for us. Double-Click the Button on the storyboard and Xamarin should switch you to the LocatorViewController.cs tab, where you’ll see this yellow code hint:
-
- Press Enter and Xamarin should generate this code:
partial void findMeButton_TouchUpInside (UIButton sender)
{
    throw new NotImplementedException ();
}
Start Coding
-
- Lets save our work at this time using File>Save All
- Now, lets replace the code in the findMeButton_TouchUpInside function. Add the line:
partial void findMeButton_TouchUpInside (UIButton sender)
{
    MKCoordinateRegion region;
}
-
- Notice the variable type is red, which means that the class you are editing doesn’t know what a MKCoordinateRegion is. To fix, right click on it, and choose Resolve>Using MonoTouch.MapKit. If you scroll to the top of the class, you’ll see the MapKit class was imported. Now lets enter the rest of the code. The function should look like this:
partial void findMeButton_TouchUpInside (UIButton sender)
{
    MKCoordinateRegion region;
    MKCoordinateSpan span;
    region.Center=myMap.UserLocation.Coordinate;
    span.LatitudeDelta=0.005;
    span.LongitudeDelta=0.005;
    region.Span=span;
    myMap.SetRegion( region, true );
}
-
- You’ll notice as you type that Xamarin is suggesting code for you. This is similar to the IntelliSense feature in Visual Studio on the PC, and also several other programming IDEs. Next we need to add one more line of code to a different function. Scroll up to the ViewDidLoad function, and add the myMap line:
public override void ViewDidLoad ()
{
    base.ViewDidLoad ();
    // Perform any additional setup after loading the view
    myMap.ShowsUserLocation=true;
}
-
- Save your work and lets try this app out. Assuming you have the iOS simulator installed on your system, or have published to your iPhone before, press the Debug Button

download source
Test and Debug
Since the iOS simulator does not have a real location service like your iPhone, it will simulate one. You can change the current simulated location in the iOS Simulator using Debug > Location > Custom Location and setting the longitude and latitude. You can also simulate a moving location as demonstrated in this video:
Update for iOS 8
Just finished this post a week before iOS 8 officially rolled out and the update caused the application to break. I started getting this error message:
Trying to start MapKit location updates without prompting for location authorization. Must call -[CLLocationManager requestWhenInUseAuthorization] or -[CLLocationManager requestAlwaysAuthorization] first.
A few extra steps are required to make this work in iOS 8 now:
Edit the Property List File (plist)
-
- In the Solution pane on the left, look for the file Info.plist.
- Double click it to open the tab for it
- At the bottom of the window, click on the Source tab
- Click on the green plus symbol to add a new entry
- Change the text Custom Property to NSLocationWhenInUseUsageDescription
- Click on the Value field for this entry and enter a message to prompt the user for location access such as Please allow this app to access your location.
Add some C#
-
- Add this locationManager variable under the class definition. If the CCLocationManager is red, right click and choose Resolve>Using MonoTouch.CoreLocation
public partial class LocatorViewController : UIViewController
{
	CLLocationManager locationManager;
-
- Update the ViewDidLoad function to look like this:
public override void ViewDidLoad ()
{
	base.ViewDidLoad ();
	// Perform any additional setup after loading the view, typically from a nib.
	locationManager = new CLLocationManager();
	locationManager.RequestWhenInUseAuthorization();
	myMap.ShowsUserLocation=true;
}
Again, this last section is only for iOS 8, so you would not need to do this for iOS 7.